Forza Horizon 6 Tokyo City Treasure Hunt: Complete Location Guide for the Spring Series Chest
What Is the Tokyo City Region Treasure Hunt? The Tokyo City Treasure Hunt is the fourth and final treasure challenge of Series 1 in Forza Horizon 6, available only during the Spring season week from...
What Is the Tokyo City Region Treasure Hunt?
The Tokyo City Treasure Hunt is the fourth and final treasure challenge of Series 1 in Forza Horizon 6, available only during the Spring season week from June 11 to June 18. Each treasure hunt in the Festival Playlist rewards 3 points and 100,000 credits upon completion. That may not sound like much, but those 3 points can be the difference between unlocking the season’s top cars and falling short.
The Spring season offers two headliner cars at specific point thresholds. At 15 points you earn the 1996 Toyota Starlet Glanza V, a cult-classic JDM hot hatch. At 30 points the reward is the 1974 Toyota Corolla SR5, a cornerstone of Japanese automotive history. Beyond that, Series 1 itself has larger milestone rewards: 60 total points unlock the 2008 Mazda Furai concept car, and 120 points unlock the 2010 Nissan 370Z. Missing the Tokyo City chest could leave you stranded a few points short of those exclusive vehicles.
Time is the enemy here. The treasure chest becomes unavailable at 2:30pm UTC on June 18, when Series 1 ends and the season rolls over. After that, the chest is gone forever. No second chances.
Pinpointing the Treasure Chest – The Tomitama Warehouse Landmark
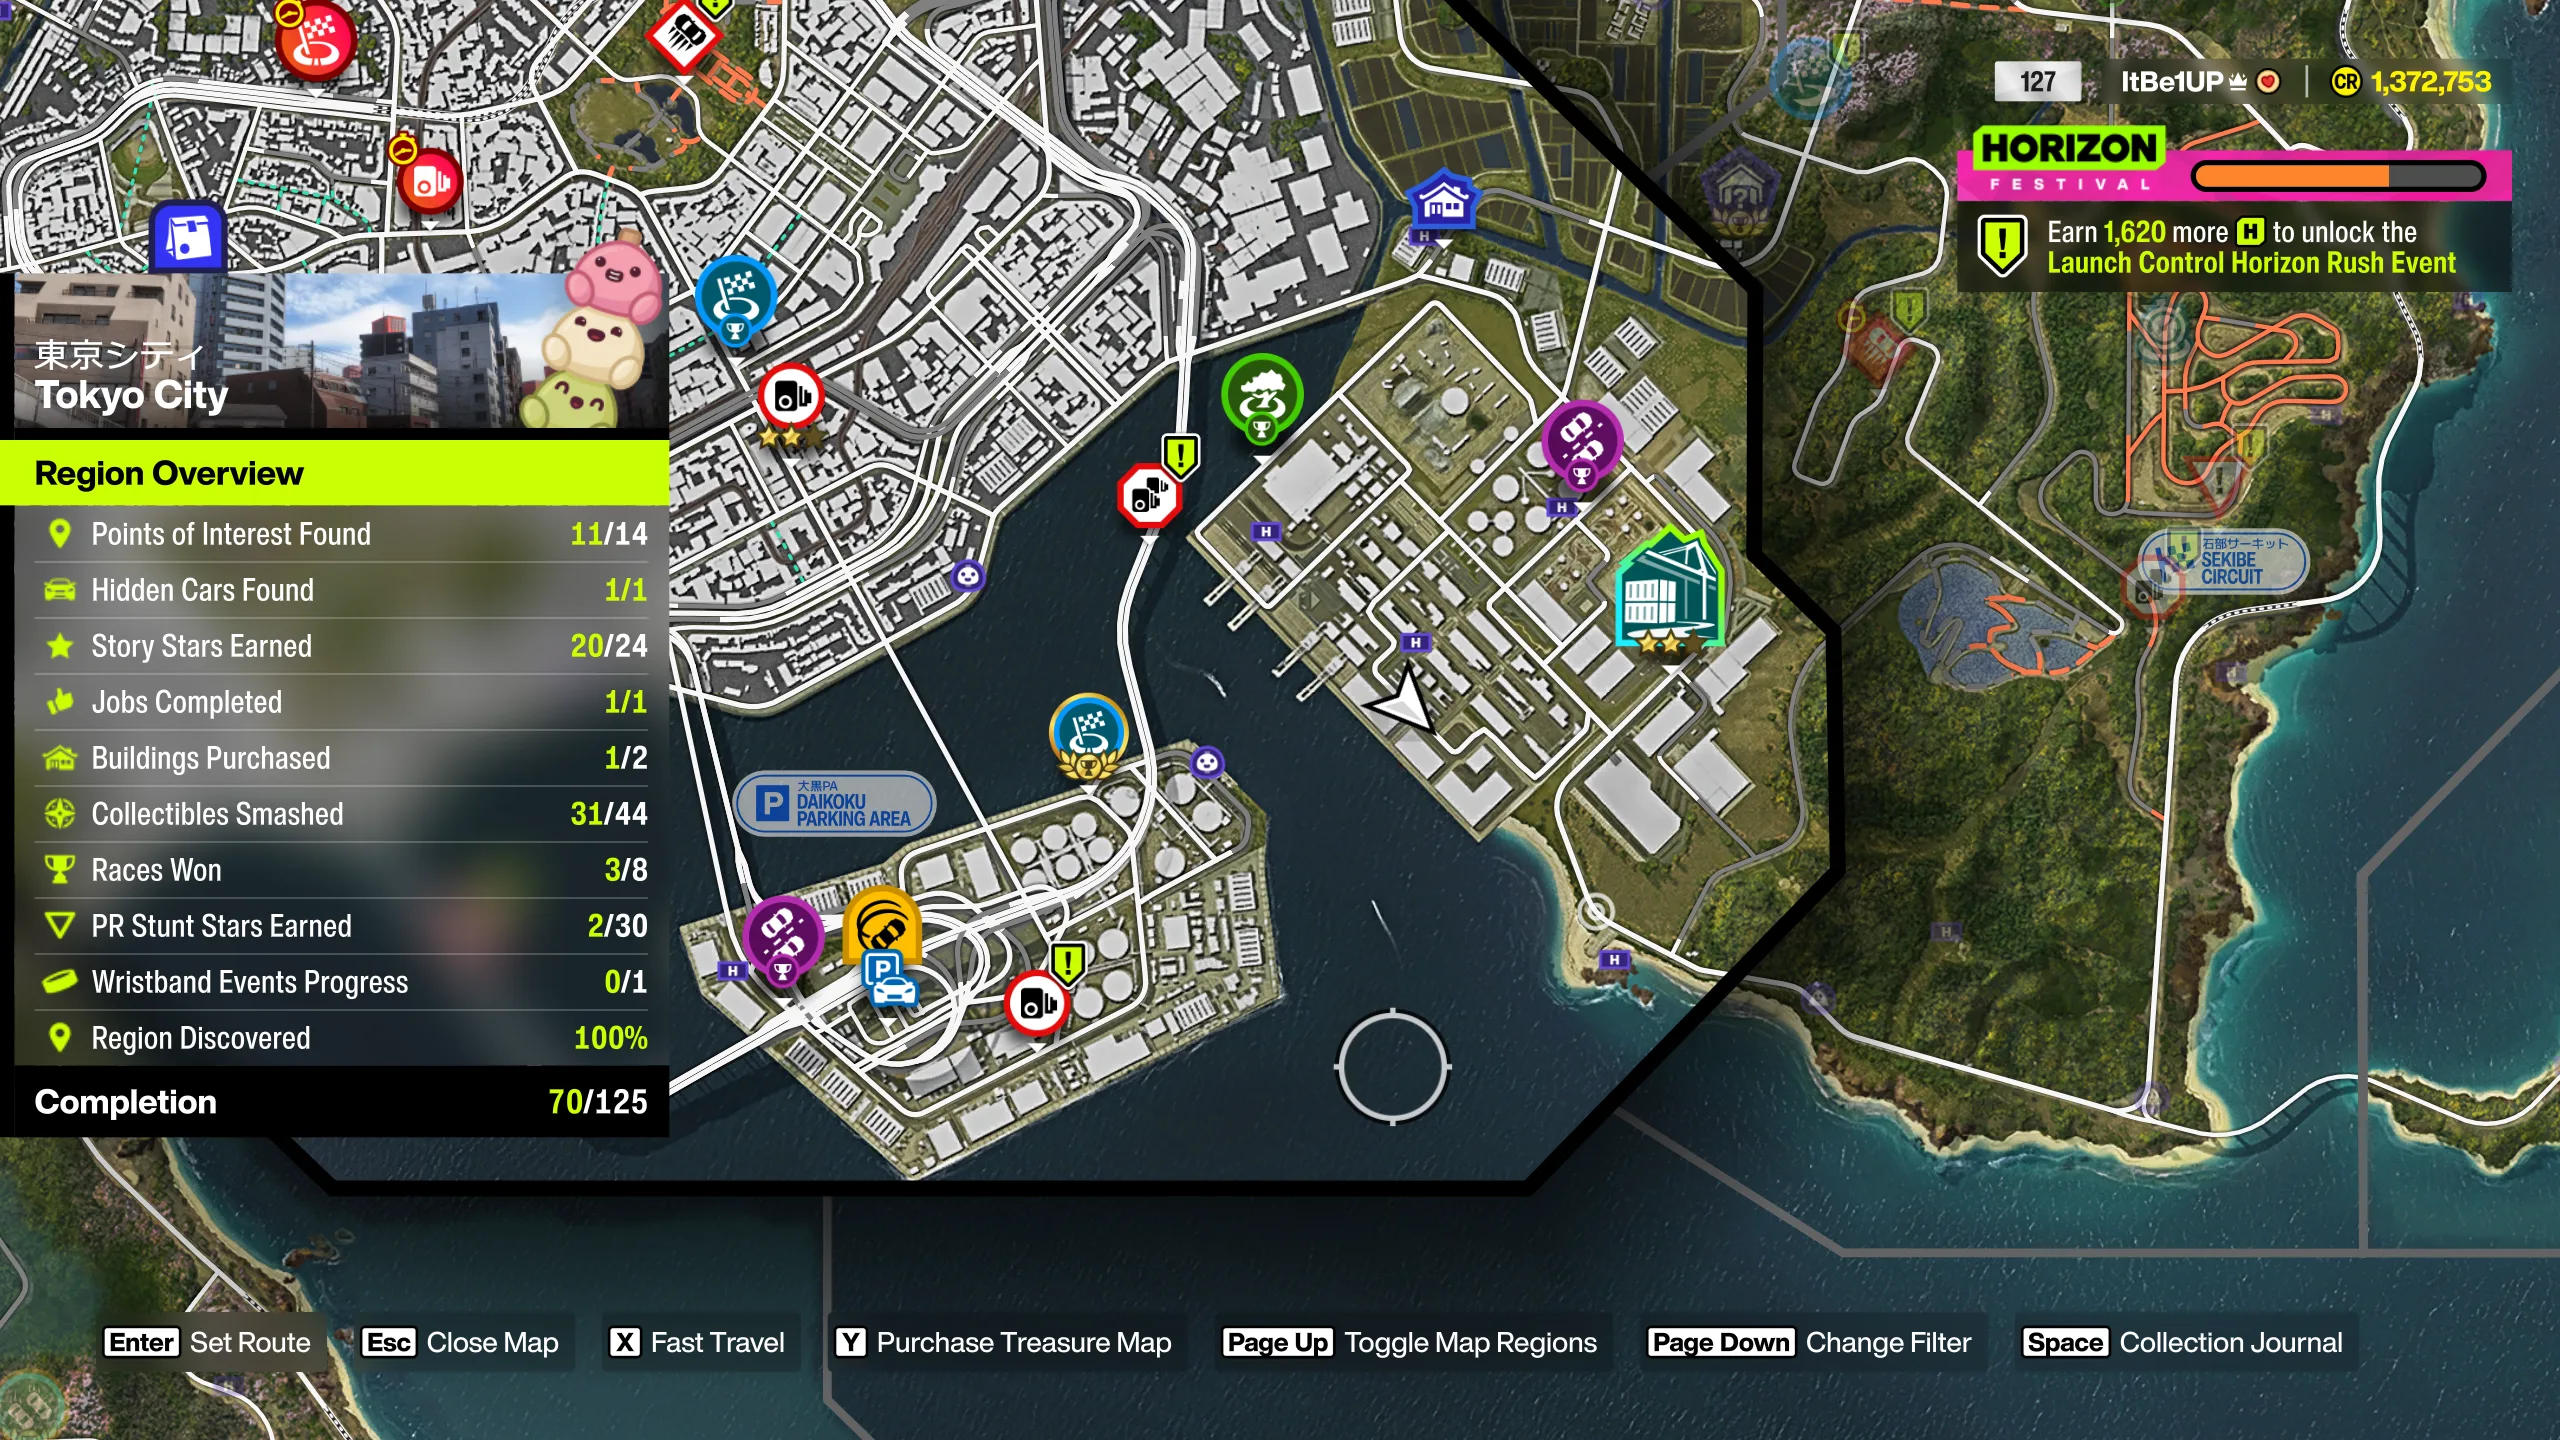
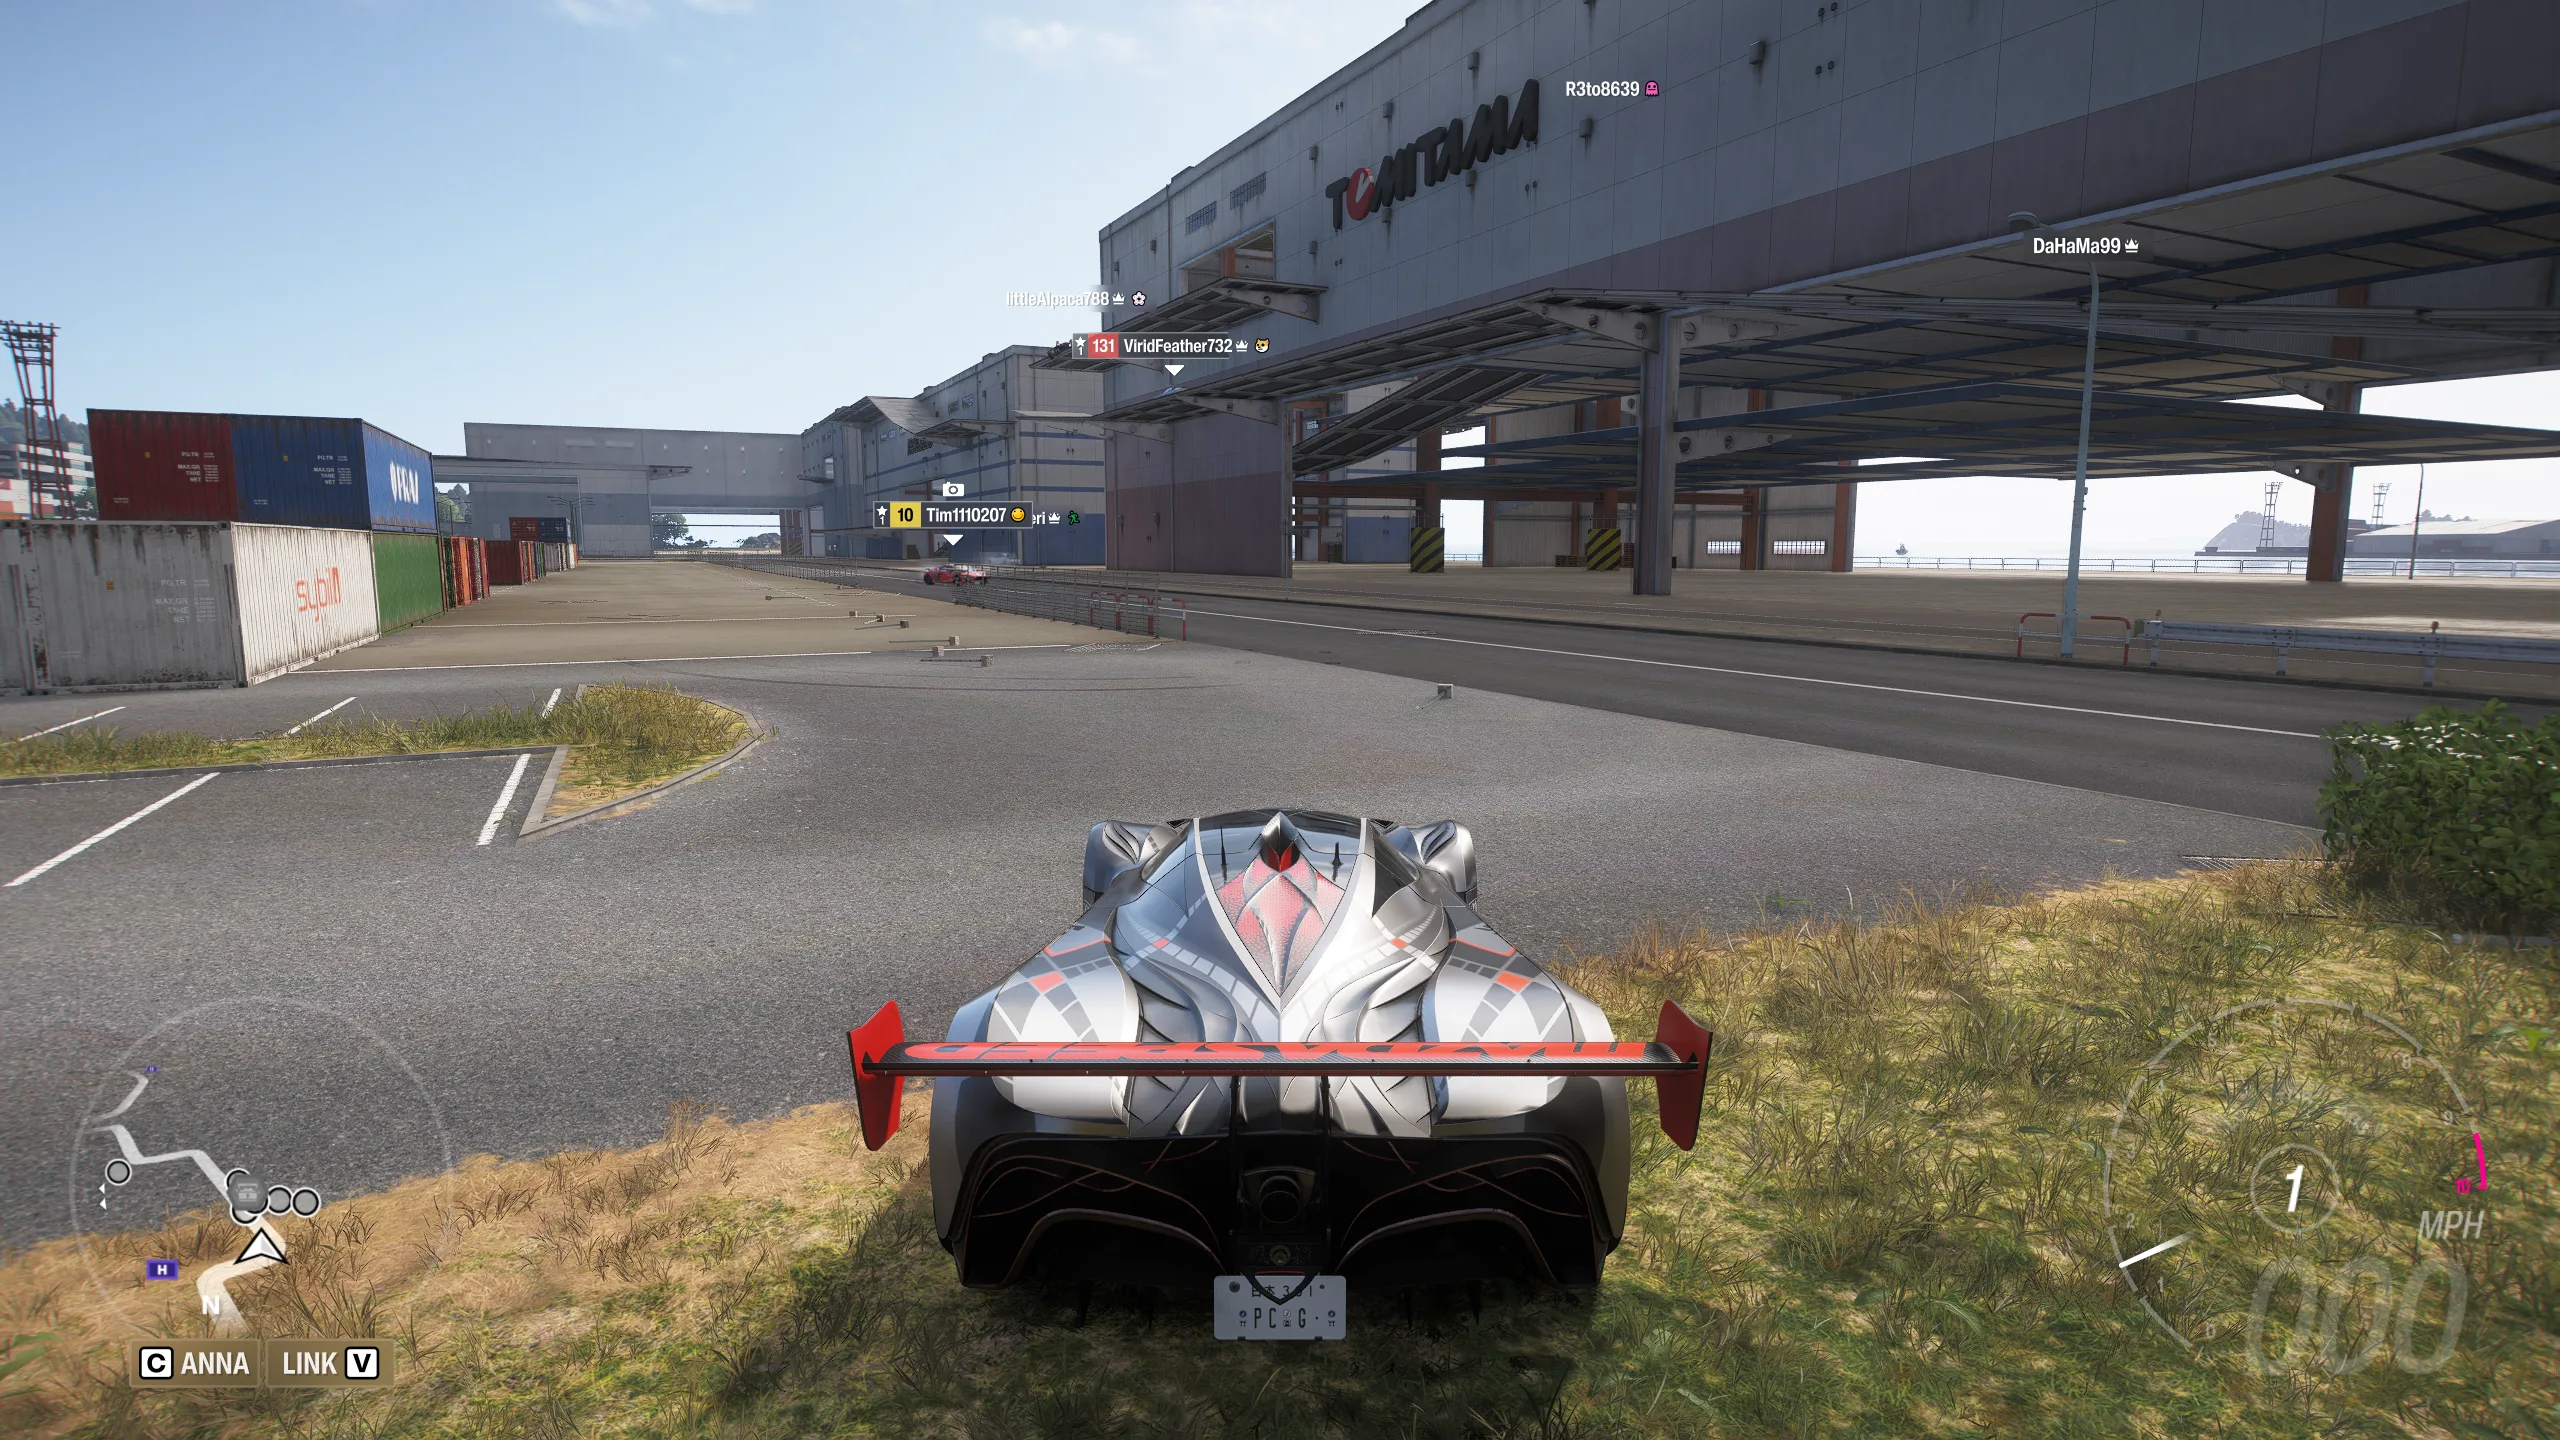
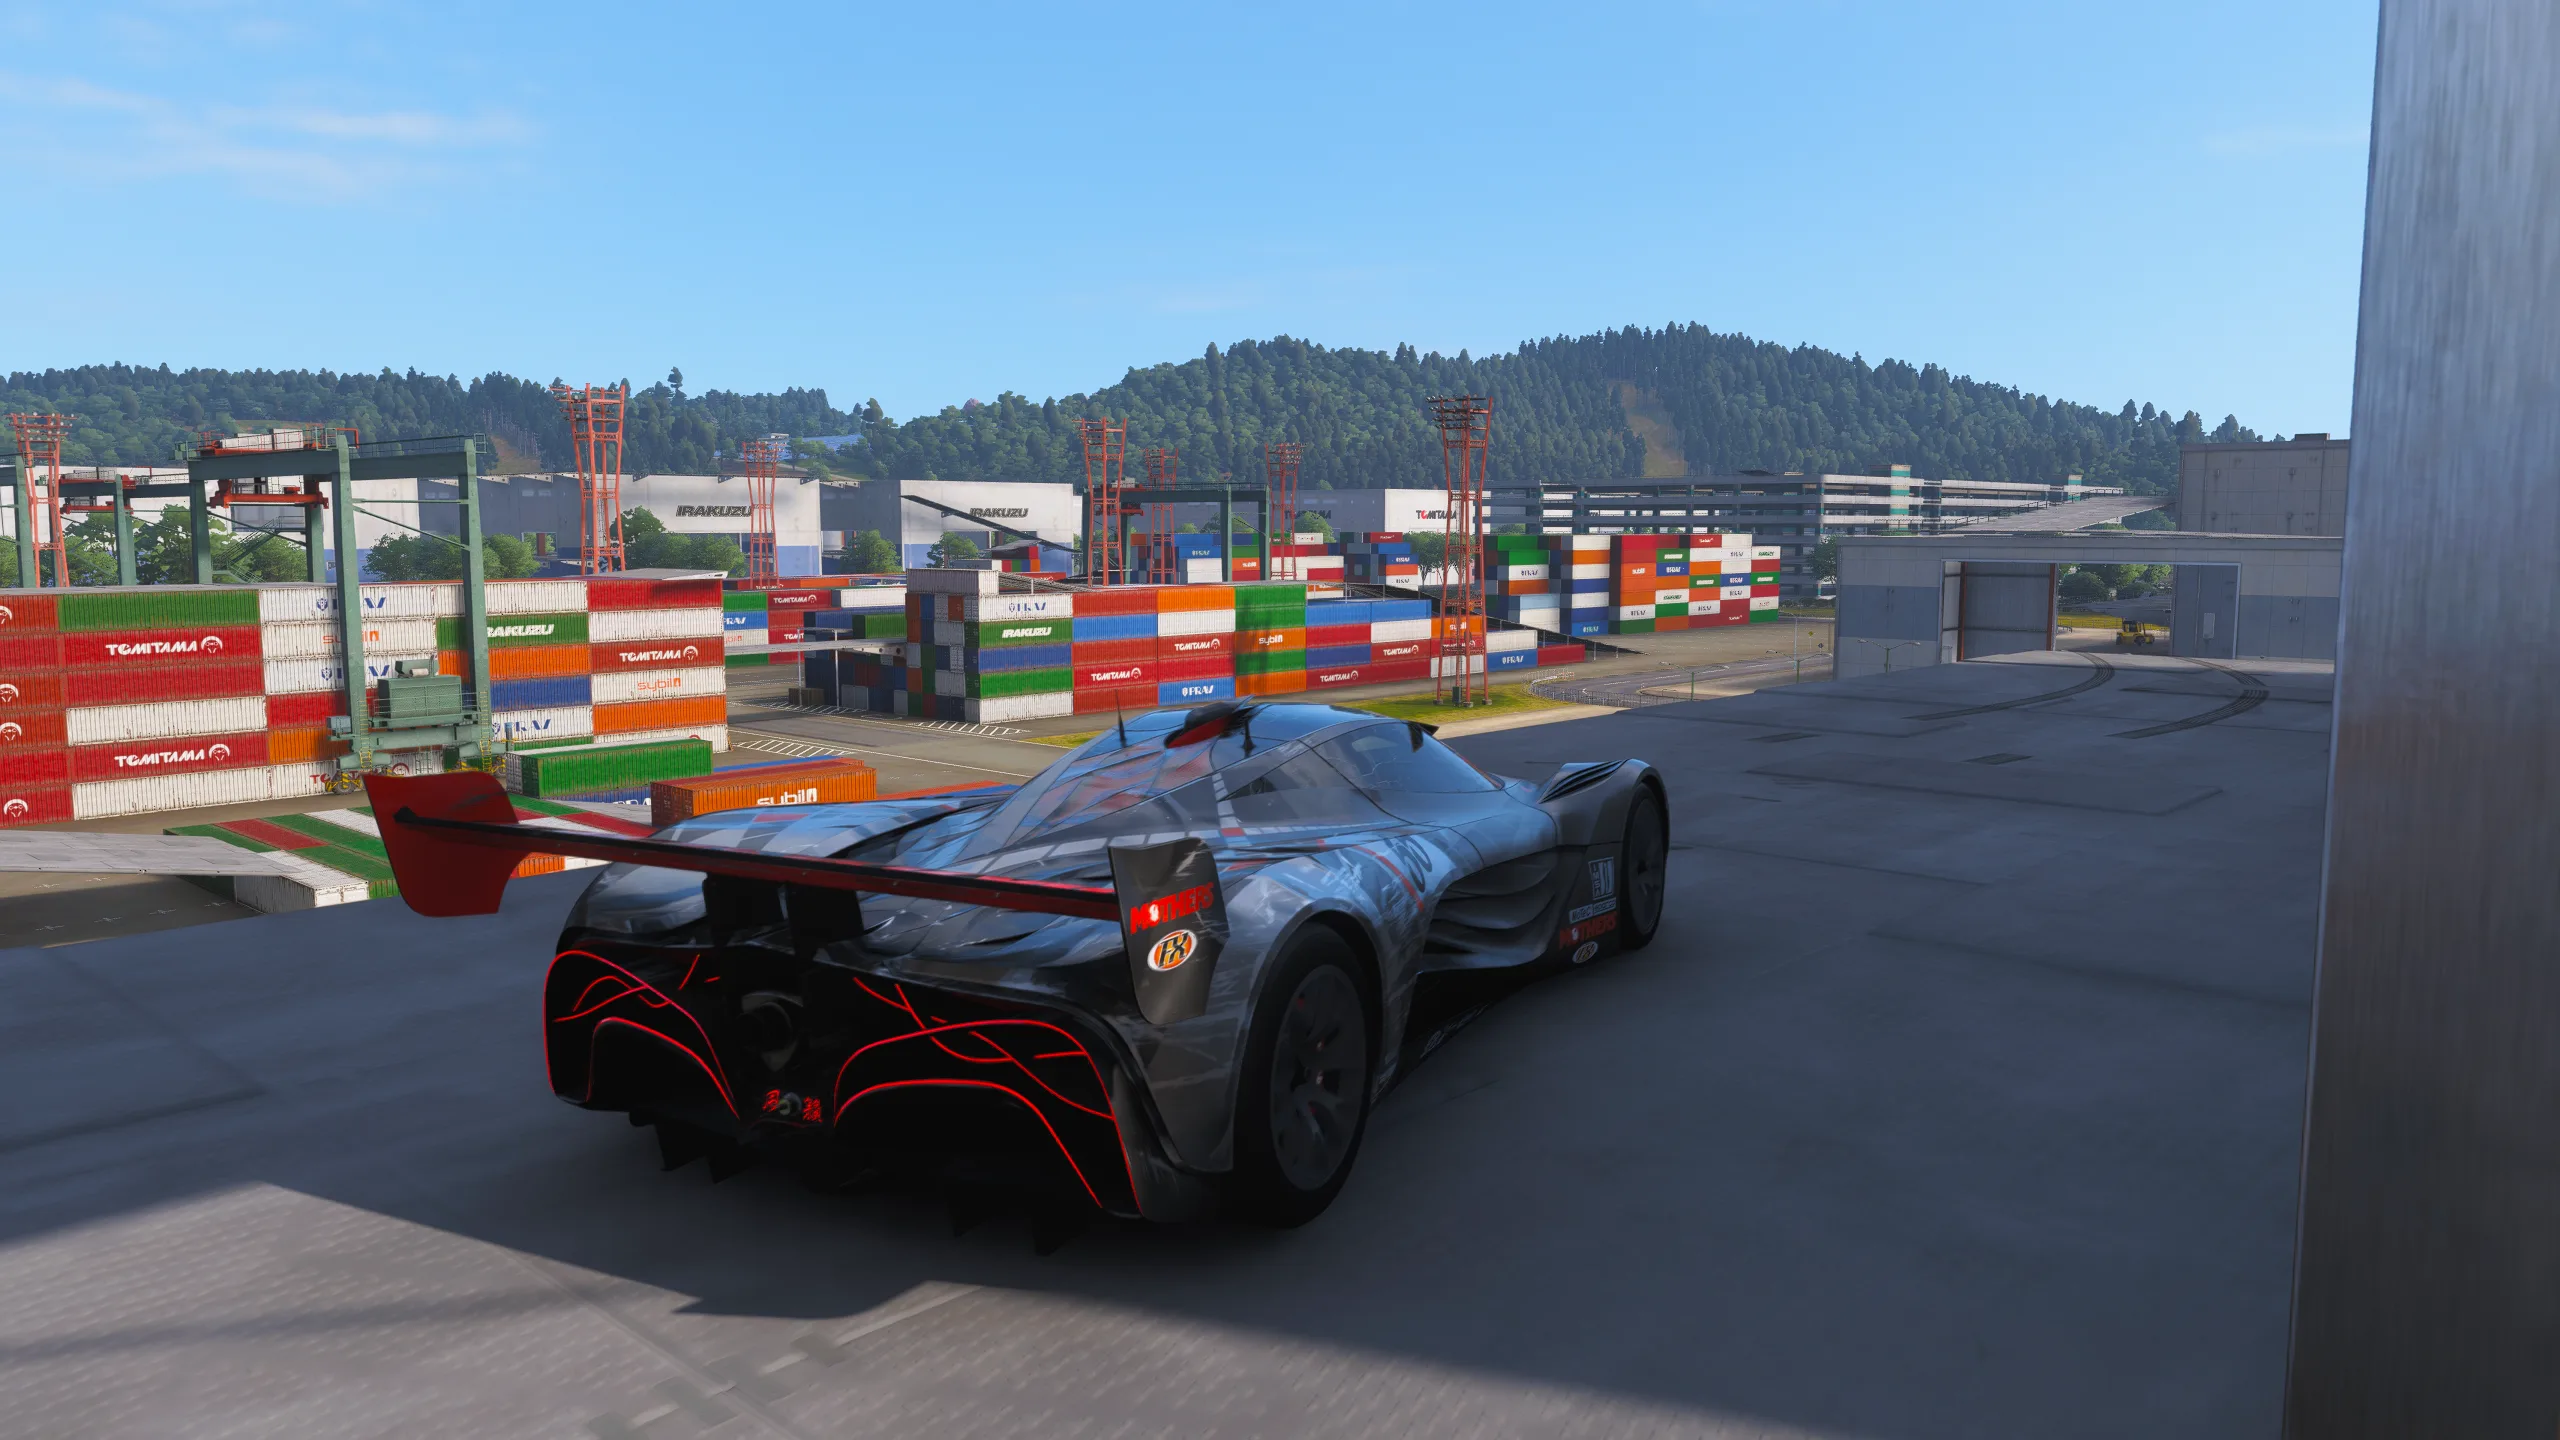
The treasure chest is located in the industrial docks on the eastern edge of Tokyo City, an area dominated by container cranes, shipping yards, and multi-colored warehouses. The key landmark is the Tomitama warehouse, a building easily identified by its pinkish base and brightly painted exterior. It sits near the water’s edge, with a visible exterior ramp curving up one side.
The chest itself is not on the main roof of that warehouse. It sits on a lower exterior platform or balcony attached to the warehouse just above that ramp. To reach it, you’ll need to get onto the roof of the Tomitama building first, then drop down onto the platform. That means you need to find a way onto the roof, and the game does not make it easy.
The best fast-travel starting points are the Tokyo City Docks Drift Zone (if you have unlocked it) or the Pier Pressure event, which requires the Yellow Wristband. Both put you right in the dock area, saving you a long drive from the mainland.
Step-by-Step Route – From the Docks to the Roof
This is where the precision driving comes in. The route requires a car capable of maintaining around 60 MPH (roughly 120 km/h) to clear the gaps between buildings. Specific cars that work well include the 2018 Ford Mustang RTR (great acceleration and handling for A-class) or the 2020 Subaru WRX STI (rally-bred stability on tricky surfaces). For a lighter option, the 1995 Mitsubishi Eclipse GSX tuned for rally tires offers excellent grip on the glass-slick rooftops. Avoid cars that are too heavy or too slow; you need enough speed to make the jumps, but not so much that you overshoot the landing zones.
Pro tuning tip: Equip rally tires and a slight suspension upgrade to improve stability when landing on the glass panels—if you can avoid them altogether, do, but the extra grip helps if you clip one.
Step 1 – The first ramp: Drive to the Tomitama warehouse and find the exterior ramp on its side. Aim straight up it and build speed. You want to hit the end of the ramp at around 60 MPH. This will launch you across a gap toward the roof of the adjacent warehouse. (Pro tip: the ramp is located on the side facing the water, near a cluster of shipping containers—keep an eye out for the pinkish building with the huge “Tomitama” sign.)
Step 2 – Jump to the adjacent warehouse: As you fly through the air, keep your car straight. The landing is on a flat roof with a few hazards: there are glass panels embedded in the surface. If you land on one, it will break, and your car will fall through, likely causing a crash and reset. Aim for the solid metal sections of the roof. Once you land, brake quickly to avoid sliding off the far side.
Step 3 – Cross the adjacent roof and jump back: Now you need to navigate across this roof to find a second ramp on the far side. Drive carefully, avoiding the glass panels. You’ll see a ramp that points back toward the Tomitama warehouse. Line up your car and accelerate. Launch off this ramp to return the way you came, aiming to land on the main roof of the Tomitama building. This is the trickiest jump because you are landing on a slightly higher level. If you undershoot, you’ll fall back to ground level. If you overshoot, you may slide off the other side.
Step 4 – Drop to the chest: Once you are on the Tomitama roof, stop near the edge above the exterior ramp. Look down and you’ll see the lower platform attached to the building. The treasure chest is sitting right there. Carefully drive off the roof and drop onto that platform. You don’t need a huge drop—just a gentle roll forward. Land on the platform, collect the chest, and the treasure hunt is complete. Your reward of 3 Festival Playlist points and 100,000 credits will pop instantly.
If you miss any of these jumps, don’t panic. Reset from the nearest road or fast-travel point and try again. Each attempt takes only a couple of minutes once you know the route. Patience and a stable car are your best friends here.
Rewards and Deadlines – Why You Need to Act Fast
Completing the Tokyo City Treasure Hunt gives you exactly what you need to push your Festival Playlist points over the edge. The Spring season rewards at 15 and 30 points are both iconic JDM cars that will be difficult to obtain later. The 1996 Toyota Starlet Glanza V is a lightweight turbocharged rocket that has been a fan favorite since the early Gran Turismo days. The 1974 Toyota Corolla SR5 is a classic that no Japanese car collection should be without.
Beyond the seasonal rewards, those 3 points also count toward the larger Series 1 milestones. At 60 total points you unlock the 2008 Mazda Furai, a stunning concept car with a rotary engine that sounds like no other vehicle in the game. At 120 points the reward is the 2010 Nissan 370Z, a modern classic that holds its own in A-class races. Every point matters, and the treasure hunts are often the simplest way to earn them compared to grinding through seasonal championships or speed zones.
The clock is ticking. The chest disappears at 2:30pm UTC on June 18. After that, the opportunity is lost, and you’ll have to hope the cars return in a future playlist or the Forzathon Shop. Don’t leave it to the last minute.
Securing the Series 1 Rewards
The Tokyo City Region Treasure Hunt is the final puzzle in a series of weekly challenges that have guided players through the first month of Forza Horizon 6. It’s not the hardest treasure hunt ever conceived, but it is one of the most spatially challenging due to the rooftop route and the glass hazards. Knowing the Tomitama warehouse and the sequence of jumps makes all the difference.
Start at the docks, hit the ramp at 60 MPH, cross the adjacent roof avoiding the glass, double back onto the Tomitama roof, and drop to the platform. That’s the entire route. If you can execute those four steps, you’ll claim your 3 points and keep your Series 1 progression on track for those iconic JDM rewards. Japan is a huge map with many secrets, but this chest is one you cannot afford to miss before the season ends.