Resident Evil 4 Remake: Complete Guide to All Lake Puzzles in Chapter 4
The Lake Region’s Puzzle Landscape All three puzzles are encountered within minutes of each other in Chapter 4, immediately after the Del Lago boss fight. The path leads into a cave complex with two...
The Lake Region’s Puzzle Landscape
All three puzzles are encountered within minutes of each other in Chapter 4, immediately after the Del Lago boss fight. The path leads into a cave complex with two distinct shrines and a stone pedestal tucked between the Merchant’s shop and the Fish Farm. The Remake reworked these puzzles significantly from the 2005 original. What once required simple lever pulls or item insertions now demands careful observation of symbols, perspective tricks, and a specific sequence of button presses. The area also contains one of the easiest-to-miss locations in the game: the Small Cave Shrine at the northeast dock. If you don’t take the boat across the lake after the boss fight, you’ll never find it, and you’ll hit a story roadblock later.

Large Cave Shrine, The Pressure Plate Puzzle
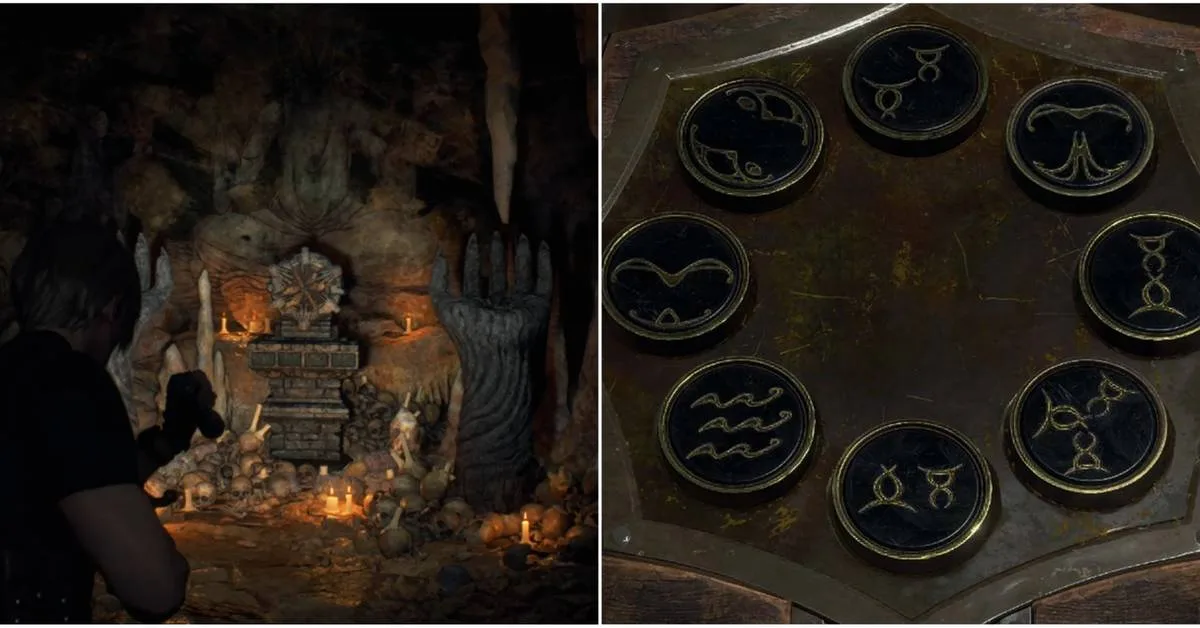
The first puzzle greets you inside the main cave behind the dock. A massive stone door blocks progress, and at its base sits an eight-button pressure plate. Above the door, a series of carved symbols are arranged in a specific order. The solution demands that you step on the buttons in that same order, but the plate itself offers no labels.
Here is the trick: number the buttons like a clock face. The topmost button is position 1, then count clockwise: 2 is the top-right, 3 is the middle-right, 4 is the bottom-right, 5 is the bottom, 6 is the bottom-left, 7 is the middle-left, and 8 is the top-left. Now look at the symbols above the door. They may vary slightly between playthroughs due to the Remake’s randomized puzzle logic, but the principle remains consistent. Because the Remake randomizes which symbol corresponds to which button position, the exact order shown in screenshots may not match your playthrough. The clock-face numbering method always works, just match the symbols from left to right. For example, if you see a symbol corresponding to button 1, then button 3, then button 5, you press those in order. Step on the wrong one and the plate resets, forcing you to start over.
Once you input the correct sequence, the door grinds open, allowing you to progress deeper into the cave. This puzzle is mandatory, there is no way around it. Take your time, and if you stumble, remember you can use a photo mode or screenshot to compare symbols more easily.
Small Cave Shrine, The Visual Alignment Puzzle
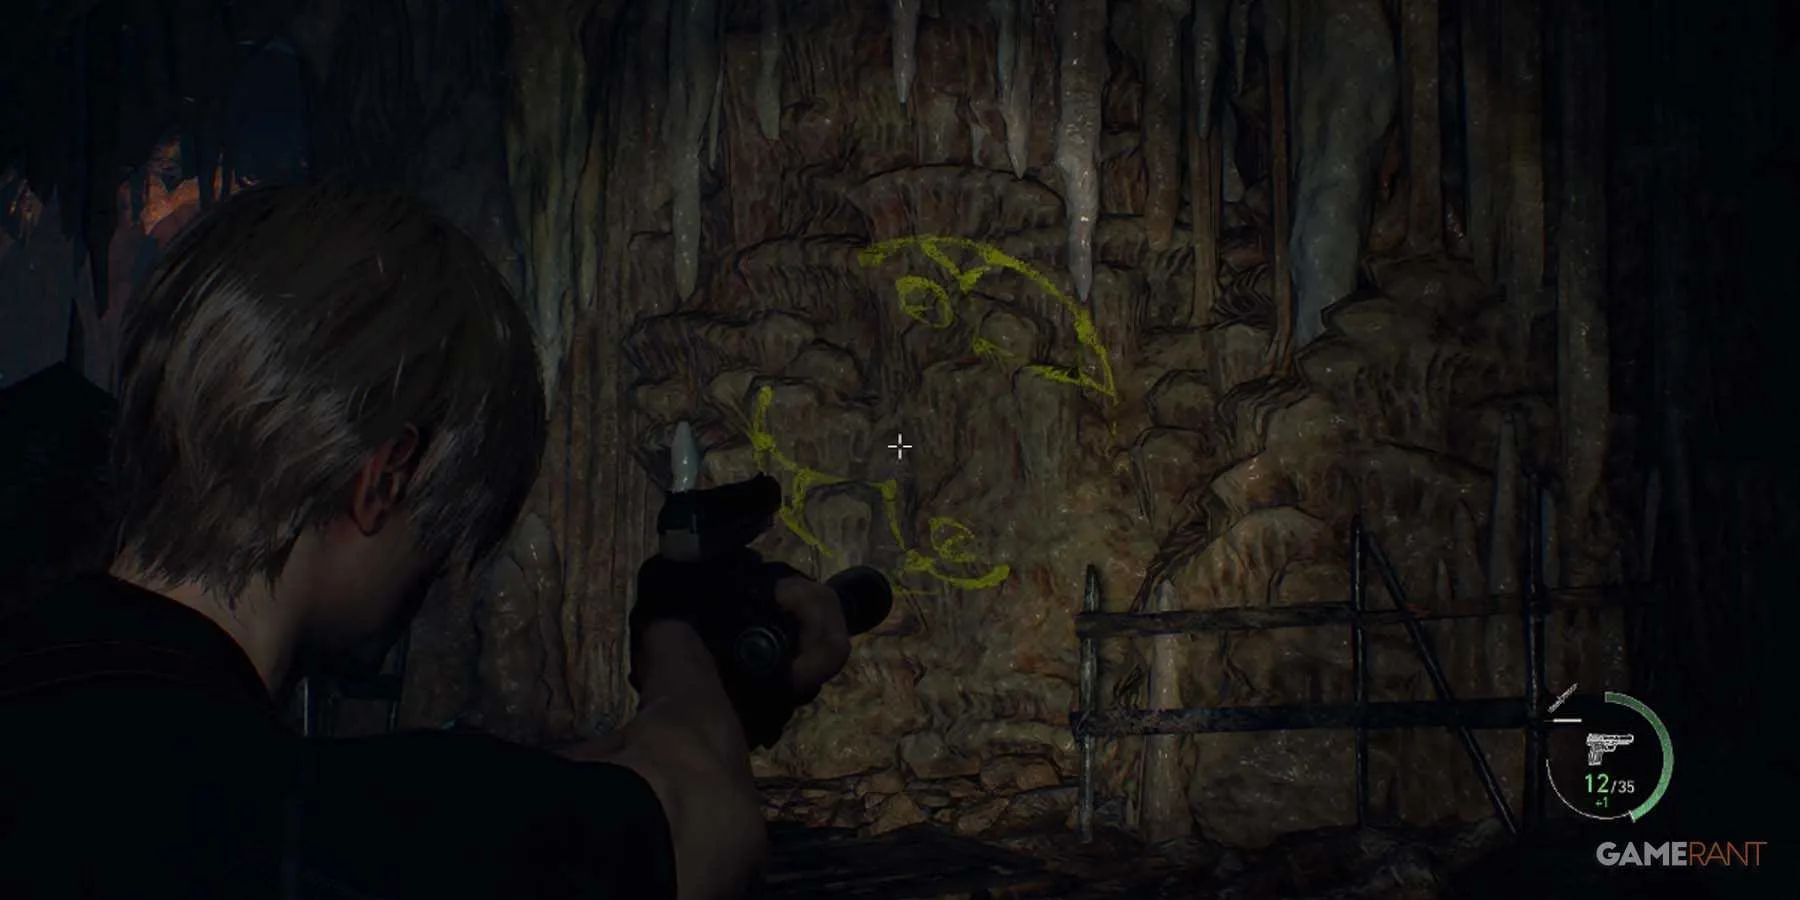
After opening the large door, you’ll need to backtrack to the boat. Head northeast across the lake, you may have missed this dock earlier because it’s tucked behind a rocky outcropping. Pull the boat ashore and enter the Small Cave Shrine. Inside, an altar holds a movable stone head. The walls are painted with yellow patterns that seem to be random streaks.
This puzzle is a perspective challenge. It is not about pressing buttons in a sequence but about standing in the right spot. Walk around the room and look for a position where the yellow painted lines on the walls align perfectly with the markings on the altar. The game gives you a subtle hint: the floor may have a slightly different texture or a faint scuff mark indicating where to stand. Once you find that exact viewpoint, the head becomes interactable. Approach it and collect the Blasphemer Head, a key story item needed to open a locked door later in the cave.
This shrine is easy to overlook, but it is essential for story progression. Without the Blasphemer Head, you cannot advance in Chapter 4. The puzzle itself takes only a minute once you understand it requires physical positioning, not item manipulation. After collecting the Blasphemer Head, don’t forget to pick up Hexagon Piece C from the same area (often on a nearby ledge or the altar) if you plan to complete the optional treasure puzzle below.
Hexagon Stone Pedestal, The Optional Treasure Puzzle
Between the Merchant shop and the Fish Farm, a stone pedestal stands with three empty hexagonal slots. This is the Hexagon Stone Pedestal, an optional puzzle that rewards the Depraved Idol, a treasure worth 15,000 pesetas when sold. To solve it, you need to insert three Hexagon Pieces: A, B, and C.
- Hexagon Piece A is found in the cave after solving the Large Cave Shrine puzzle. Look for a small alcove or container near the frescos.
- Hexagon Piece B is located near the Merchant shop, often resting on a box or crate. It’s in plain sight but easy to miss if you’re rushing.
- Hexagon Piece C is inside the Small Cave Shrine (northeast dock) and becomes accessible after you solve the visual alignment puzzle and claim the Blasphemer Head.
Once all three pieces are inserted into the pedestal, a compartment opens and the Depraved Idol appears. This treasure is one of the most valuable you can find in Chapter 4, and selling it to the Merchant gives you a significant boost for upgrading weapons. There is no penalty for skipping it, it is entirely optional, but completionists and players hungry for pesetas should make the detour.
Quick Checklist for the Lake Region
- [ ] Large Cave Shrine solved (pressure plate)
- [ ] Small Cave Shrine aligned (Blasphemer Head obtained)
- [ ] Hexagon Piece A collected
- [ ] Hexagon Piece B collected
- [ ] Hexagon Piece C collected (from Small Cave Shrine)
- [ ] Hexagon Stone Pedestal completed (Depraved Idol collected)
A final tip: after collecting the Blasphemer Head, you can return to the main cave and use it to unlock the door leading to the next area. Do not leave the lake without also grabbing Hexagon Piece C from the Small Cave Shrine if you plan to complete the pedestal. A quick boat trip back will save you a long walk later. With these solutions, you’ll leave the Lake region richer, wiser, and ready for whatever awaits in the castle beyond. For the castle’s even trickier puzzles, check our Chapter 5 guide.